
Citadel Reactivation Software
DIGISTOR Citadel SSDs, with their preboot authentication and self-encrypting drive capabilities, can be sent from the manufacturer (a major computer OEM, system integrator, or DIGISTOR, for example) with the need to reactivate the preboot authentication capability.
These instructions will show you how to create a bootable USB thumb drive and issue the correct commands to reactivate the preboot authentication capability of your Citadel SSD.
Activate your Citadel K Series SSD
Download: DIGISTOR Citadel USB Activator 1.2.2.19 Aug2023.zip (121.2 MB)
MD5: c36464e8d364fdc92dea483deace516d
Sha256: e014e01dd0c2fd14b29a15f4d1ad863f2d410ff31241d3d3ddcee39c8c6d5202
Activate your Citadel K Series SSD
Download: DIGISTOR Citadel USB Activator 1.2.2.19 Aug2023.zip (121.2 MB)MD5: c36464e8d364fdc92dea483deace516d
Sha256: e014e01dd0c2fd14b29a15f4d1ad863f2d410ff31241d3d3ddcee39c8c6d5202
Create a Bootable USB Thumb Drive
-
Insert a USB thumb drive into your computer.
-
Format a USB thumb drive to the FAT32 file system.
Caution
Be sure you backup any files on the drive because they will be erased!
Important
Ensure that no other partitions or files exist on the thumb drive! If you have multiple partitions on the thumb drive, you may have to use other tools to delete them such as “Disk Management” which is built into Windows 8.1 and Windows 10.
-
Open the ZIP file you downloaded and extract the “COPY_TO_USB” folder to your computer.
-
Navigate into the “COPY_TO_USB” folder. Copy the contents of the “COPY_TO_USB” folder to the thumb drive.
Important
Do not copy the “COPY_TO_USB” folder itself over to the thumb drive. Your system will probably be unable to boot from it if you do.
You now have a bootable thumb drive. If you require more help, please contact Technical Support.
Configure UEFI/BIOS Settings
You will need to properly configure your BIOS or UEFI in order to properly boot from the thumb drive. To do so, follow the instruction set below that’s applicable to your situation. Specific instructions have been provided for Dell computers, as well as a generic instruction set for all other computers.
For All Computers
Follow these steps to ensure your computer’s BIOS or UEFI settings are configured correctly. To access the BIOS or UEFI, you may have to press Delete, F2, or F12 when starting your computer up.
-
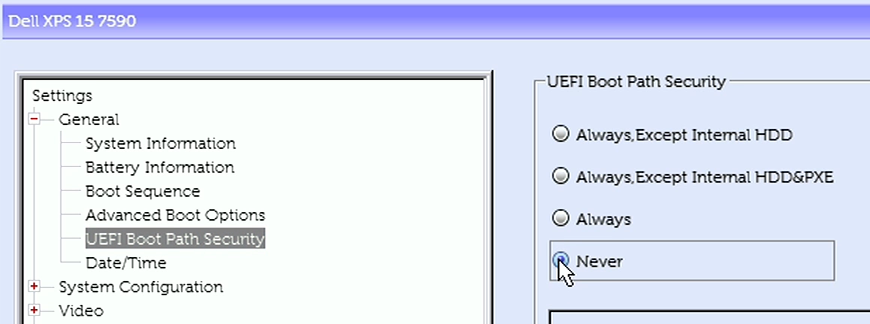
If you have an option for “UEFI Boot Path Security” or something like it, be sure to change it to Never.
-
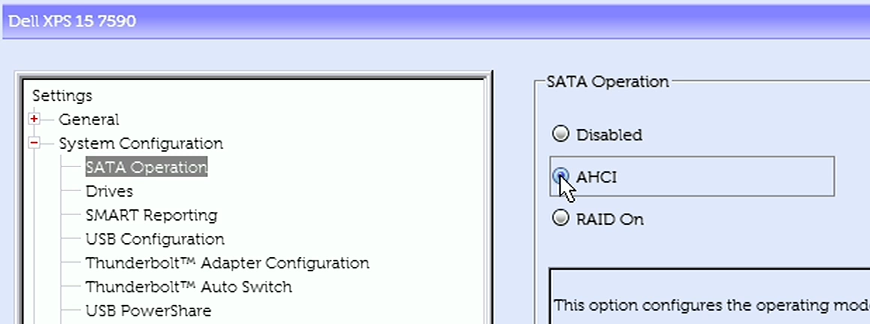
Ensure that your “SATA Operation” is set to AHCI.
-
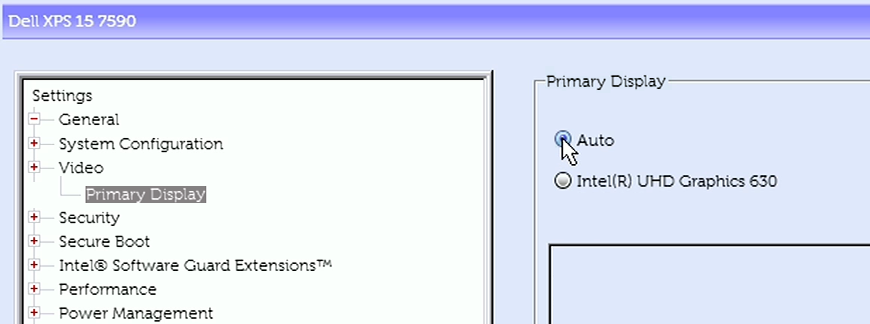
If you have a discrete video card, ensure your primary display detection is set to Auto.
-
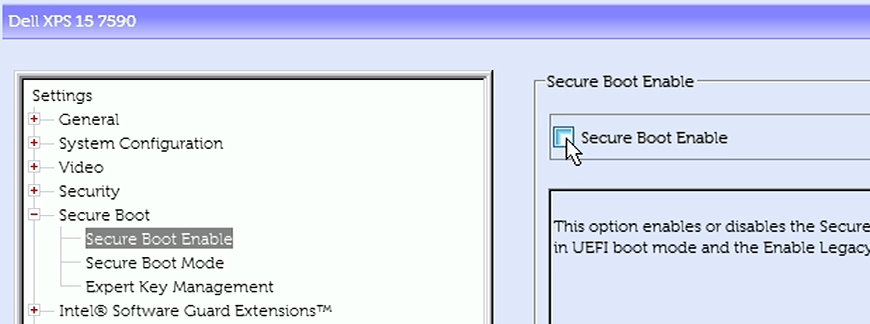
Disable “Secure Boot”.
Note
The Citadel SSD does support Secure Boot, but only once activated. You may reenable Secure Boot after you finish reactivating the Citadel SSD.
For Dell Computers
Follow these steps to ensure your Dell computer’s UEFI settings are configured correctly. To access the UEFI, you may have to press F2 or F12 when starting your computer up.
-
Navigate to “General > UEFI Boot Path Security” and change it to Never.
-
Navigate to “System Configuration > SATA Operation” and change it to AHCI.
-
If your Dell computer has an upgraded video card, navigate to “Video > Primary Display” and ensure it is set to Auto. Otherwise, this option will not be available and you can continue onto the next step.
-
Navigate to “Secure Boot > Secure Boot Enable” and uncheck the box next to the “Secure Boot” option to disable it. A dialog box may pop up warning you that disabling Secure Boot will reduce system security. Click Yes to disable it.
Note
The Citadel SSD does support Secure Boot, but only once activated. You may reenable Secure Boot after you finish activating the Citadel SSD.
How to Boot into the Thumb Drive
-
Insert the bootable USB drive with the Citadel SSD activation software into the computer and turn it on.
-
Continually press the key for accessing your motherboard’s boot menu while the computer starts up. This key to access it differs on different models, but the most common keys are F12, F10, F2, or Esc.
-
The motherboard’s boot menu will appear. Choose the USB thumb drive from the list of boot options.
-
A Linux BASH prompt will load. Press Enter to activate the console.
Remove Existing Boot Sequences
Important
You only need to follow this section if your computer has been previously used for several different operating systems. You may skip this step if your computer is brand new.
However, if your computer does have a previous operating system and you wish to keep it, you can also skip this step. Please note that DIGISTOR does not recommend keeping previous operating systems as a best practice.
-
Boot into the thumb drive using the steps above. See How to Boot into the Thumb Drive (above).
-
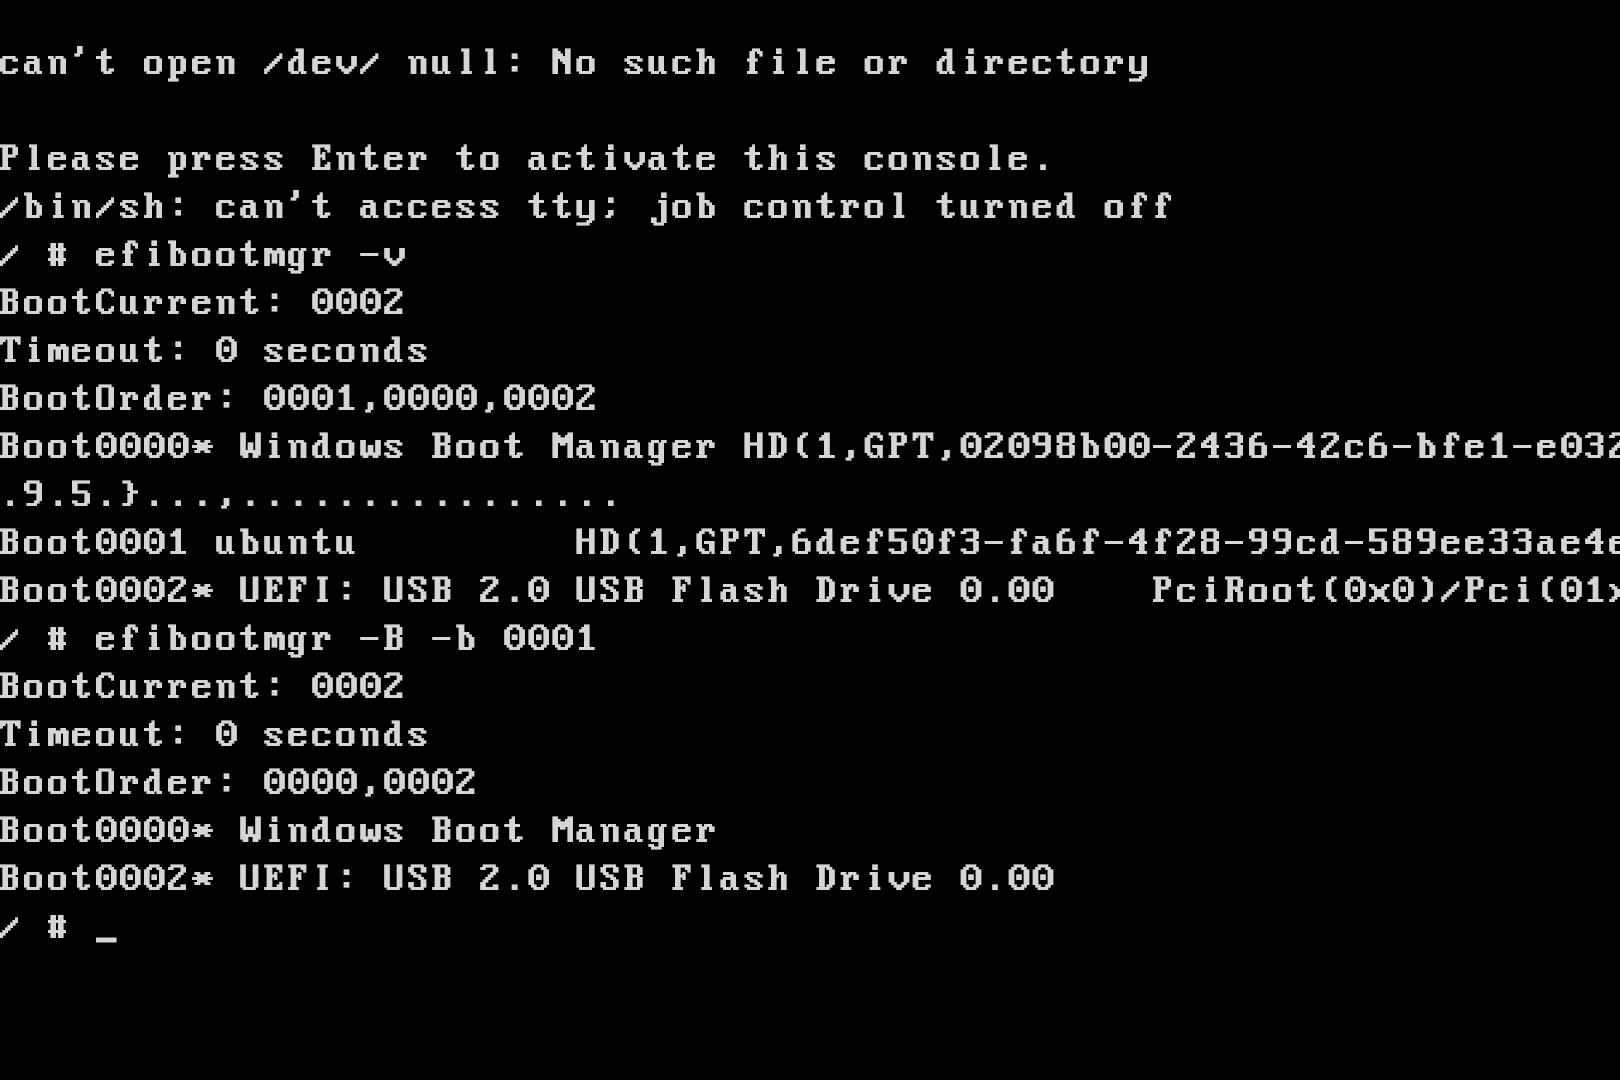
Type in efibootmgr -v and press Enter. You will see text similar to that seen in the screenshot below.
-
If you see any boot sequences (indicated by “Boot0000”, “Boot0001”, etc.), use the following command to delete them, where <xxxx> is the four digit number that corresponds to the boot sequence you wish to delete: efibootmgr -B -b <xxxx>.
-
When you have finished deleting the existing boot sequences, turn off the computer.
Install the Operating System or Virtual Environment
Your Citadel SSD has been shipped to you deactivated and unlocked. Install any operating system (OS) or virtual machine (VM) at this time.
Tip
If you need to turn on a Trusted Platform Module (TPM), Virtualization Support, or Trusted Execution, you can turn them on in the UEFI.
After you have installed the OS or VM, perform a cold reboot by turning your computer off and back on again and test the OS or VM.
Activate the Citadel SSD
-
Boot into the thumb drive using the steps above.
-
Type in the command below that applies to the type of Citadel SSD you have. Please note that the following text is case sensitive.
Caution
The following commands will only work when your Citadel SSD is the only SATA or NVMe drive installed in the system. If you have multiple drives, please ensure you are using the correct Linux boot path for your Citadel SSD. To do so, type sedutil-cli –-scan and press Enter. If you need more help, contact Technical Support for help.
-
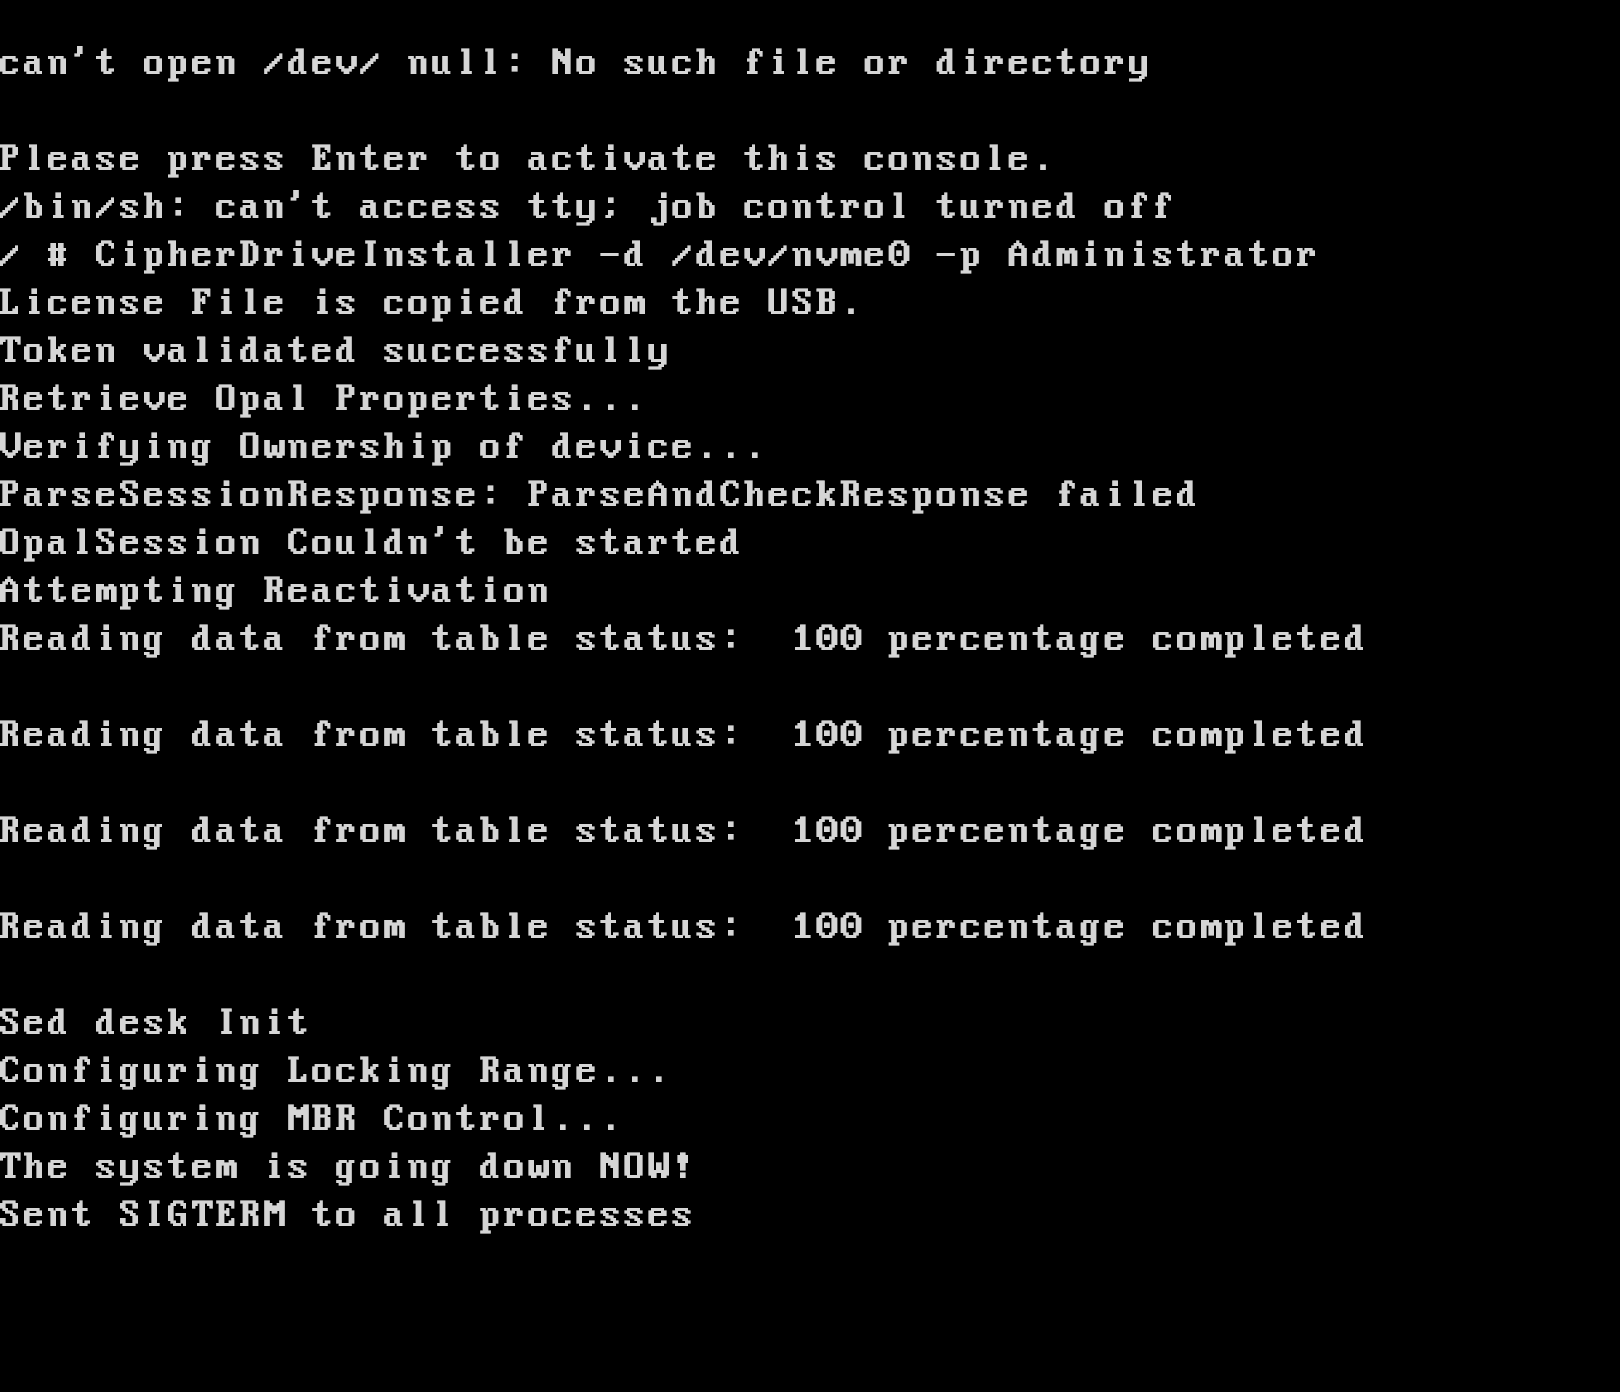
M.2 NVMe SSD: CipherDriveInstaller -d /dev/nvme0 -p Administrator -
SATA 2.5-inch or M.2 SATA SSD: CipherDriveInstaller -d /dev/sda -p Administrator
Note
The default password is Administrator and it is case-sensitive. You can change it once you log into the Citadel SSD software dashboard.
-
-
The computer will shut down automatically. Remove the USB thumb drive and reboot the system.
The Citadel SSD has been activated!
First Time Login
Important
Before attempting to log in, make sure you have first activated your Citadel SSD.
-
If you haven’t already, turn on the computer. The Citadel SSD software will load.
-
Click the Accept button at the bottom of the Disclaimer screen that appears.
-
Log into the default Administrator account. Use the following credentials, which are case sensitive:
-
Username: Administrator
-
Password: Administrator
-
The computer will appear to reboot and your OS or VM will now start up.
Note
You should change the administrator password as soon as possible to maintain operational security. To do so, log into the dashboard by ensuring the Settings Console box is checked when you log in.
Product Support
Your investment in DIGISTOR products is backed up by our free technical support for the lifetime of the product. Contact us through our website, digistor.com/support, or call us at 1-800-816-0225.